Under Tahoe, the icons of all my AppleScript applets looked ugly, and I wanted to find a way to automate a process that would convert them to icons that look like the new-style Liquid Glass icons. As far as I understand these things, true Liquid Glass icons can only be created for apps built in Xcode, and I wanted standard .icns files that would at least look like Tahoe icons when used with my AppleScript applets. And I wanted to automate the process.
So here is an AppleScript app that converts an existing .icns file or a PNG file (256x256, 512x512, or 1024x1024) to an icon that looks like a Tahoe icon. By default it creates an icon with a light-colored background. If you add the string “dark” to the name of the script, it will instead create an icon with a dark background. If you add the string “both” to the name, it will create both styles.
The notarized, editable app is linked below. It contains (in its Helpers folder) two background images exported from the new Icon Composer. It requires the current BETA version of GraphicConverter12, because I can’t figure out how to use Apple’s built-in Image Tools to accomplish all its tasks. The code is clumsy and amateurish, but it seems to work. Any improvements will be welcome:
@emendelson
I’m not very good at English, so please forgive me if I misunderstand some parts of your post.
But since you’re not using Assets.car, I assume what you want is a sort of “Liquid Glass-❝like❞ ICNS” file, right?
Actually, it can be done using only the standard tools (you’ll need Xcode or Icon Composer.app, though).
The idea is to create an ICNS file with a Liquid Glass–❝like❞ appearance instead of the traditional icon look.
Steps
1:Create a folder named SOME.icon.
2:Inside it, create a subfolder named Assets.
3:Copy your SOME.png file into the Assets folder.
4:Create an icon.json file and place it inside SOME.icon. folder
5:Use Xcode’s built-in ictool (inside Icon Composer) to export the images.
6:From step 5, export images in the following sizes:824, 412, 206, 104, 52, 26, 14 pixels.
7:Add padding with sips, then resize to:1024, 512, 256, 128, 64, 32, 16 pixels.
8:Use iconutil to generate the final .icns file.
That’s it!
You can also use Icon Composer.app to generate the ICON file first, and then follow from step 5 onward to create the final ICNS file.
The ICON file package used by Icon Composer.app doesn’t involve any certificates, so you can freely add or remove files and edit the JSON as you like.
You can definitely do it this way.
Exporting the sizes with ictool, then using sips for padding and resizing might actually be the simplest workflow.
Give this method a try — it should work nicely! Just for reference:
ictool
The PNG files exported from ictool don’t include any padding, so they won’t have the Liquid Glass–like appearance.
When you want to create a 1024-pixel icon image, don’t export it directly as 1024×1024 — the icon artwork is drawn about 100 px inside each edge,
1024-100-100 so you should export at 824×824 instead.
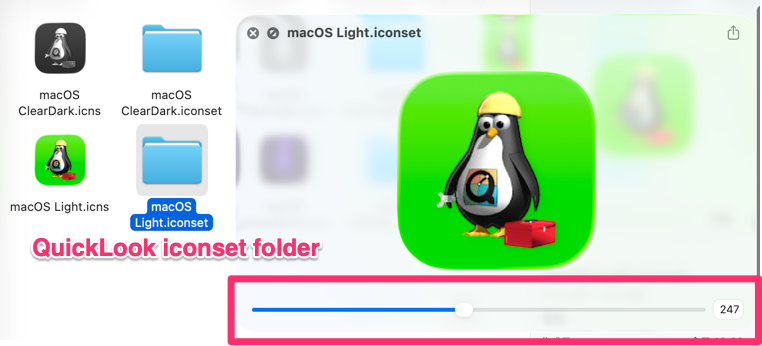
You can preview them with Quick Look. The PNG filenames inside the .iconset folder must follow this rule:
icon_x.png
icon_x@2x.png
Example: Pt Size
icon_1024x1024.png
icon_512x512@2x.png
Then, convert to ICNS:
@IceFole - Your English is very clear - thank you for this detailed report. I will try this when I next work on my icons. Would it be possible to make an AppleScript that would automate this?